★Ingredients
Crust:
1 1/2 cups graham cracker crumbs
1/2 cup unsalted butter, melted
1/4 cup granulated sugar
Cheesecake Filling:
4 (8-ounce) packages cream cheese, softened
1 cup granulated sugar
4 large eggs
1 cup sour cream
1 teaspoon vanilla extract
1/4 cup all-purpose flour
Cherry Topping:
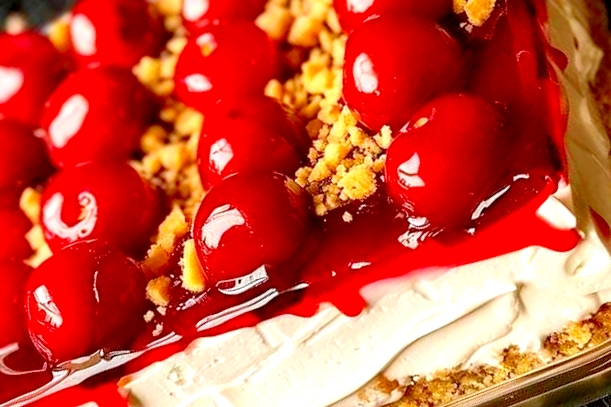
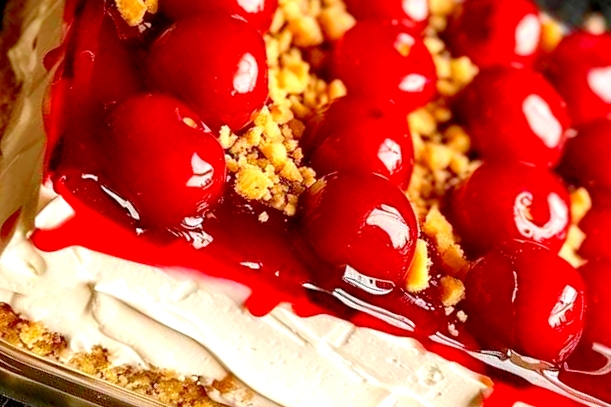
- 1 (21-ounce) can cherry pie filling
- Quick and delicious chocolate fudge
- Apple pie that melts in your mouth! For 5 minutes of work! Apple pie
★Instructions
- Preheat the Oven: Preheat your oven to 325°F (165°C).
- Prepare the Crust:
- In a medium bowl, combine the graham cracker crumbs, sugar, and melted butter. Mix until well combined.
- Press the mixture firmly into the bottom of a 9-inch springform pan.
- Bake the crust for 10 minutes, then remove from the oven and let it cool while you prepare the filling.
- Make the Cheesecake Filling:
- In a large mixing bowl, beat the cream cheese and sugar together until smooth and creamy.
- Add the vanilla extract and mix well.
- Add the eggs one at a time, beating well after each addition.
- Mix in the sour cream and flour until just combined. Be careful not to overmix.
- Bake the Cheesecake:
- Pour the cheesecake filling over the cooled crust.
- Bake for 55-60 minutes, or until the center is set but still slightly jiggly.
- Turn off the oven, crack the door open, and let the cheesecake cool in the oven for about 1 hour.
- Remove the cheesecake from the oven and let it cool completely at room temperature.
- Once cooled, refrigerate the cheesecake for at least 4 hours or overnight.
- Add the Cherry Topping:
- Spread the cherry pie filling evenly over the top of the chilled cheesecake.
- Serve: Remove the cheesecake from the springform pan, slice, and enjoy!
Tips
- Ensure all your ingredients, especially the cream cheese and eggs, are at room temperature to avoid lumps in your cheesecake.
- To prevent cracks, avoid overmixing the batter and overbaking the cheesecake. The cheesecake should be slightly jiggly in the center when done.
- For a smoother removal from the pan, run a knife around the edge of the cheesecake before removing the springform ring.
Enjoy!